Sponsored
Today's issue is sponsored by Packt. I really recommend you to read 2 of their published books:
Blazor WebAssembly - Take your Blazor WebAssembly skills to the next level with "Blazor WebAssembly By Example" (available on Amazon here), featuring practical projects that will enhance your development expertise and help you create cutting-edge web applications with ease.
Web Development with Blazor Build powerful and scalable web applications with ease using "Web Development with Blazor," the ultimate guidebook filled with interactive exercises and practical insights. Available on Amazon at url.
Many thanks to the sponsors who make it possible for this newsletter to be free for readers.
Want to reach thousands of .NET developers? Sponsor TheCodeMan →
The Background
SOLID is an acronym for a set of 5 design principles that help improve the maintainability, scalability, and stability of software systems. These principles were introduced by Robert C. Martin and are widely used in object-oriented programming. Here's a brief explanation of each principle: 1. Single Responsibility Principle (SRP): A class should have only one reason to change, meaning it should have only one responsibility. This principle helps to achieve separation of concerns. (not completely true by today).
2. Open/Closed Principle (OCP): Software entities (classes, modules, functions, etc.) should be open for extension but closed for modification.
3. Liskov Substitution Principle (LSP): Subtypes must be substitutable for their base types without affecting the correctness of the program. This principle ensures that derived classes can be used as their base class without any issues.
4. Interface Segregation Principle (ISP): Many client-specific interfaces are better than one general-purpose interface. This principle helps to reduce the number of unimplemented or unnecessary methods in a class.
5. Dependency Inversion Principle (DIP): High-level modules should not depend on low-level modules. Instead, both should depend on abstractions (e.g., interfaces). This principle helps to decouple software components, making the system more maintainable, flexible, and easier to test.
Single Responsibility Principle
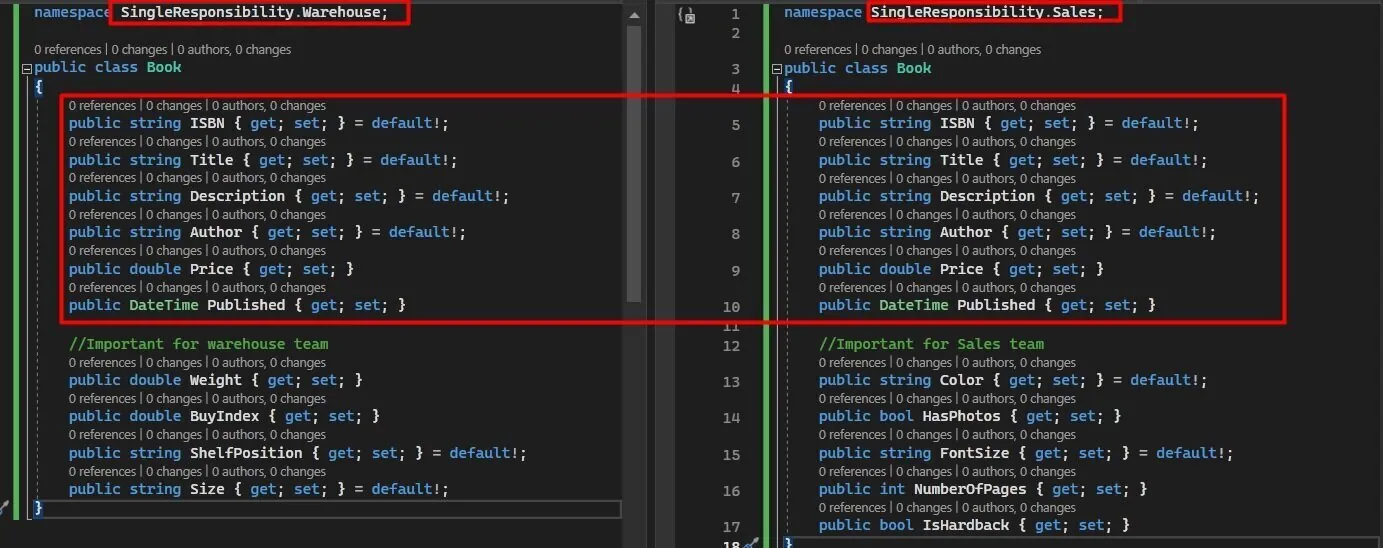
People frequently misinterpret and misquote the idea that "a class or function should only have one responsibility." Although this guidance is beneficial, it does not precisely align with the Single Responsibility Principle. What actually means? The reason to change isn’t a technical one implied by the ‘Do One Thing’ rule, where the reason might be that a different framework is being used, or errors need to be logged in a different format. The reason to change here is that a real-world process has changed or needs to change, and the code needs to reflect that. Different departments or teams within an organization often use distinct jargon and have unique perspectives on their processes. For instance, in a company that sells books, the way employees in a physical store discuss a book may differ significantly from how those in the warehouse or sales and purchasing teams discuss it. It is possible to have two distinct versions of a class named Book, each designed for a particular department or process with the required properties. Both versions would include an ISBN for possible system connectivity. If modifications were made to the Book class utilized by the sales department, they would not affect the software in the warehouse since it uses its own implementation of the Book class specific to its Bounded Context.
 Check the GitHub repo for the code for free.
Open-Closed Principle
It was introduced by Bertrand Meyer in 1988. The Open/Closed Principle states that software entities (classes, modules, functions, etc.) should be open for extension but closed for modification. In other words, you should be able to add new functionality or modify the behavior of a module without altering its existing code. By adhering to the Open/Closed Principle, you can create more maintainable, flexible, and scalable software. When changes are required, new code can be added through inheritance or by implementing interfaces, rather than modifying existing code, which can introduce new bugs or break existing functionality.
A common approach to achieve OCP in object-oriented languages like C# is to use interfaces and polymorphism. Here's a simple example:
public interface IPersistence{ public void Save(string data);} public class DatabasePersistence : IPersistence{ public void Save(string data) { Console.WriteLine($"Saving data to database: {data}"); }} public class FilePersistence : IPersistence{ public void Save(string data) { Console.WriteLine($"Saving data to a file: {data}"); }}
Check the GitHub repo for the code for free.
Liskov Substitusion Principle
It was introduced by Barbara Liskov in 1987. The principle states that objects of a derived class (subclass) should be able to replace objects of the base class (superclass) without affecting the correctness of the program. In other words, derived classes should be substitutable for their base classes. LSP is a stronger form of the "is-a" relationship between a derived class and its base class. It ensures that a derived class does not violate any of the contracts or expectations of the base class, such as the method signatures, return types, input parameter types, and behavior. By adhering to the Liskov Substitution Principle, you can create more maintainable, flexible, and robust software systems. It reduces the risk of introducing bugs when using inheritance and polymorphism. Here's an example to demonstrate the Liskov Substitution Principle in C#:
public interface IFly{ void Fly();} public abstract class Bird{ public abstract void MakeSound();} public class Pigeon : Bird, IFly{ public override void MakeSound() { Console.WriteLine("Coo!"); } public void Fly() { Console.WriteLine("Pigeon is flying."); }} public class Penguin : Bird{ public override void MakeSound() { Console.WriteLine("Quak!"); }}
Check the GitHub repo for the code for free. The Bird class does not have a Fly method, and we've introduced an IFly interface for birds that can fly. This updated design satisfies the Liskov Substitution Principle and better represents the relationship between different bird types and their abilities.
Interface Segregation Principle
The Interface Segregation Principle (ISP) states that many smaller, focused interfaces are better than one large, general-purpose interface. By following this principle, you can avoid forcing a class to implement methods it doesn't need or use, which makes the code more maintainable and easier to understand. Here's an example in C# to demonstrate the Interface Segregation Principle:
public interface IWork{ void Work();} public interface IEat{ void Eat();} public interface IMaintenance{ void PerformMaintenance();}
Now we can create specific worker classes that implement only the interfaces they need:
By applying the Interface Segregation Principle, we now have more focused interfaces and classes that implement only the methods they actually need. This makes the code more maintainable, easier to understand, and less prone to errors.
Setting up Hangfire
NuGet Package:
You need to install Hangfire package.
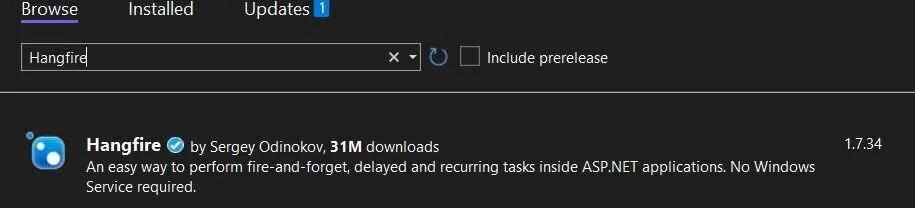
The last version is 1.7.34. Hangfire.SqlServer and Hangfire.Core are installed by default.
Setup Storage:
Hangfire has the ability to use a SQL Server database by default for storing job definitions and statuses. Additionally, you have the option to choose other alternatives. For our example project, I have decided to use MSSQL local storage for simplicity. It is essential to have a database definition, regardless of whether you use a local or remote database. Hangfire is capable of creating the necessary tables for job storage, but it cannot create a database. Therefore, you must provide a database. Once you have set up our local database, you must update the appsettings.json file:
"ConnectionStrings": { "DefaultConnection": "Server=localhost;Database=Hangfire;Trusted_Connection=True"}
Program.cs setup:
You need to add Hangfire to Services collection. You need to provide the connection string that you specified inside the appsettings.json file.
builder.Services.AddHangfire(x =>{ x.UseSqlServerStorage(builder.Configuration .GetConnectionString("DefaultConnection"));})
You also add the Hangfire server with the AddHangfireServer() method.
builder.Services.AddHangfireServer();
Lastly, you can add Hangfire Dashboard for easily monitoring servers and jobs.By calling the UseHangfireDashboard() method you are adding it to popeline.
app.UseHangfireDashboard();
DI registration:
builder.Services.AddHostedService<SomeService>();
Running the application
Persistence:
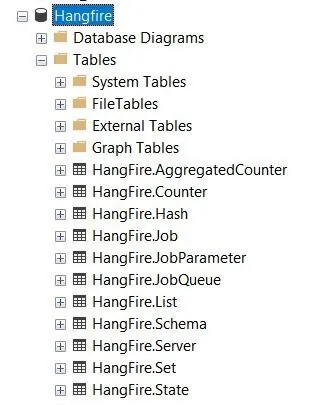
Hangfire will automatically check your storage for the necessary tables, and if they don’t exist, it will create them for you:
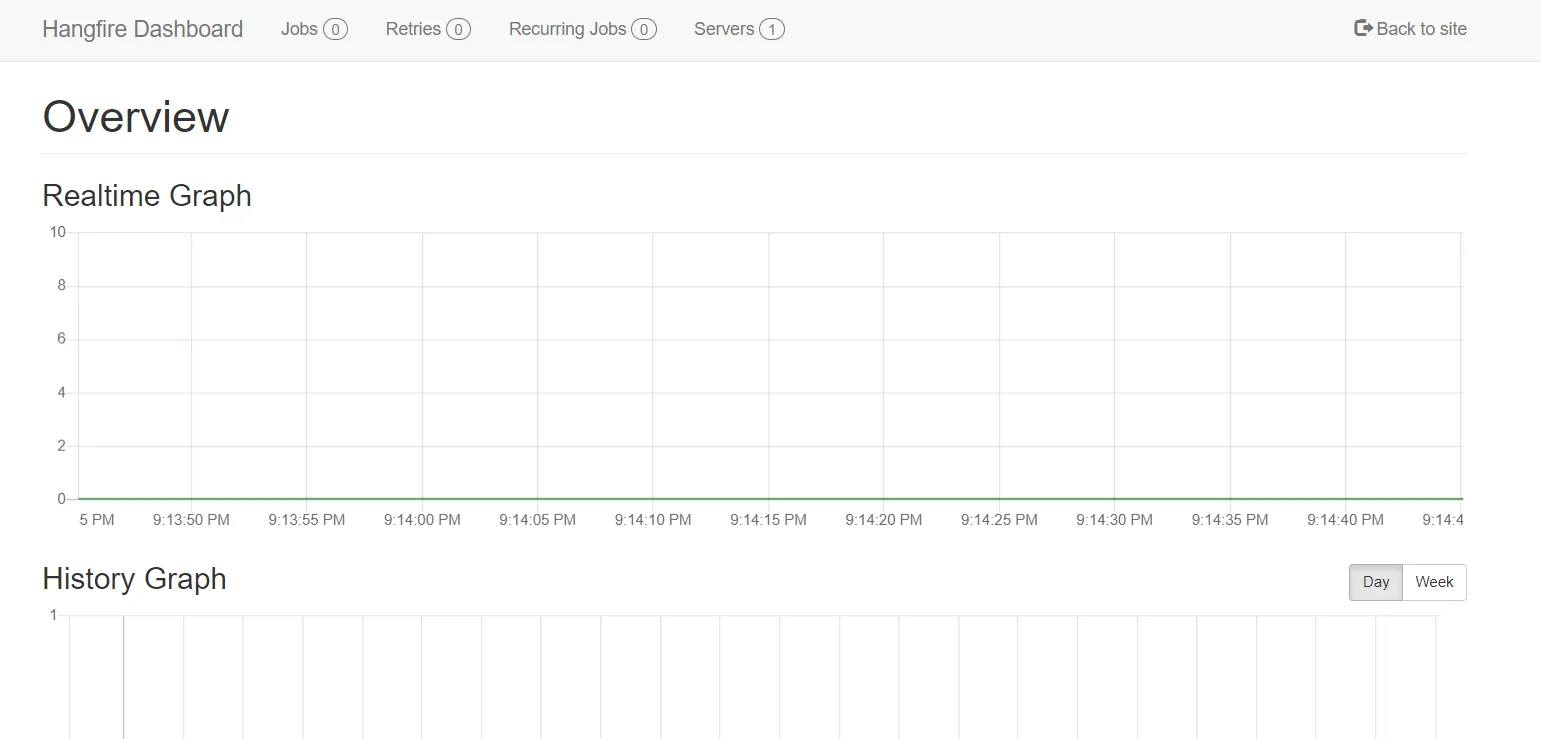
Hangfire Dashboard:
This is a web-based UI that allows you to monitor the state of your background jobs. You can use the dashboard to view the status of jobs, retry failed jobs, and cancel running jobs if necessary. To check the dashboard you need to land on /hangfire page.
Background jobs
There are several types of background jobs that you can perform using Hangfire:
- Fire-and-forget: These are jobs that are executed once and then forgotten. They are used for tasks that need to be performed in the background, but the result doesn't need to be returned to the application immediately. - Delayed jobs:
These are jobs that are scheduled to run at a specific time in the future. You can use them to schedule tasks that need to be performed at a specific time, such as sending a reminder email to a user.
- Recurring jobs:
These are jobs that are scheduled to run repeatedly at a specified interval. You can use them to automate tasks that need to be performed on a regular basis, such as generating reports or performing database cleanup.
- Continuations:
These are jobs that are executed after a previous job has completed. You can use them to create a sequence of jobs that need to be performed in a specific order.
- Batch jobs:
These are jobs that are grouped together and executed as a single unit. You can use them to perform a set of related tasks that need to be executed together.
Let' take a look on the example:
public interface IJobsService{ void FireAndForgetJob(); void DelayedJob(); void ReccuringJob(); void Continuation(); void BatchJob();}
Executing jobs
Fire and Forget jobs
We need to inject IBackgroundJobClient in order do call the job with Enqueue. Enqueueing a job means that you are adding it to a queue of jobs that are waiting to be processed. When a job is enqueued, it is not executed immediately but instead is stored in a persistent storage (usually a database) until a worker process is available to process it. In order to test, you can create an endpoint:
[HttpGet("FireAndForgetJob")]public ActionResult CreateFireAndForgetJob(){ _jobClient.Enqueue(() => _jobsService.FireAndForgetJob()); return Ok();}
Delayed jobs
The Schedule method in the IBackgroundJobClient interface of the Hangfire library is used to schedule a job to run at a specific time in the future. When you schedule a job using the Schedule method, you are specifying a delay or a specific date and time for the job to run. The job is added to a persistent storage (usually a database) and is executed automatically when the specified time is reached. Let's create another endpoint:
[HttpGet("DelayedJob")]public ActionResult CreateDelayedJob(){ _jobClient.Schedule(() => _jobsService.DelayedJob(), TimeSpan.FromSeconds(60)); return Ok();}
Continuation jobs
In other words, when you create a continuation job, you're saying "once this other job is done, then run this one." This can be useful for creating complex workflows where certain jobs need to run in a specific order, or where one job needs to finish before another can begin. To create a continuation job in Hangfire, you first need to create the parent job using one of the library's scheduling methods, such as Enqueue or Schedule. Then, you can use the Continuations API to create the dependent job that will run after the parent job is finished. Let's create another endpoint:
[HttpGet("ContinuationJob")]public ActionResult CreateContinuationJob(){ var parentJobId = _jobClient.Enqueue(() => _jobsService.FireAndForgetJob()); _jobClient.ContinueJobWith(parentJobId, () => _jobsService.Continuation()); return Ok();}
Reccuring jobs
To schedule this job you will need a different Hangfire interface. You need to inject IRecurringJobManager. A recurring job is a task that needs to be performed repeatedly on a schedule. For example, sending a weekly email newsletter, or performing a daily database backup. Using Hangfire's AddOrUpdate method, you can define the schedule for a recurring job using a cron expression, which is a string that specifies the frequency and timing of the job. Here's how the AddOrUpdate method works: you first need to specify a unique identifier for the job, which will be used to identify it later. Then, you provide a lambda expression that defines the method to be executed as the job. Finally, you specify the cron expression that defines the job's schedule. Let's create another endpoint:
[HttpGet("ReccuringJob")]public ActionResult CreateReccuringJob(){ _recurringJobManager.AddOrUpdate("jobId", () => _jobsService.ReccuringJob(), Cron.Daily); return Ok();}
Batch jobs (pro only)
Batches allow you to create a bunch of background jobs atomically. This means that if there was an exception during the creation of background jobs, none of them will be processed.
var batchId = BatchJob.StartNew(x =>{ x.Enqueue(() => Console.WriteLine("Job 1")); x.Enqueue(() => Console.WriteLine("Job 2"));})
That's all from me today. Make a coffee and check the whole project on GitHub repository.
For practical code improvements, check out Clean Code Best Practices and Architecture Tests in .NET.
Wrapping Up
Want to enforce clean code automatically? My Pragmatic .NET Code Rules course shows you how to set up analyzers, CI quality gates, and architecture tests - a production-ready system that keeps your codebase clean without manual reviews. Or grab the free Starter Kit to try it out.